


[display-name-category]
[post_author]
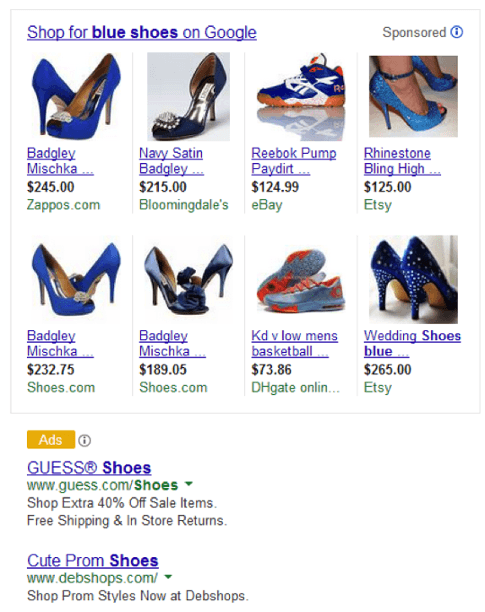
Product Listing Ads are “search ads that include richer product information, such as product image, price and merchant name without requiring additional keywords or ad text”.
Not many people are aware of this feature, but the few who are using it are getting great revenue. Customers like to compare prices and look at what they are purchasing beforehand. Some of the advantages of using PLA are that average costs per clicks tend to be lower and there’s not much to optimize like in an AdWords campaign!
Let’s say you are browsing the Internet for blue shoes and images like these come up:
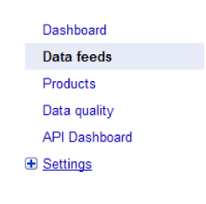
Now, if you have a wonderful product at a competitive price, wouldn’t you want to be listed right there? One of the first steps of course is to create a Merchants account, and once you have that completed the next part is creating the data feed. Log in to your Google Merchant Account.
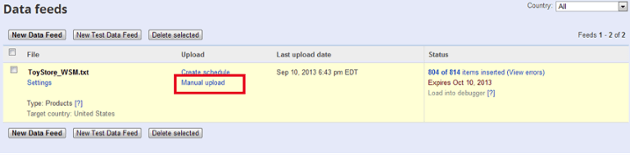
In your Merchants account, click on data feed:
Setting up the data feed could take you a while. If you are a SEM Strategist like me and you are struggling with a client to get access to his website, you know what I mean.
Google defines data feed as “a file made up of a list of products which use groupings of attributes that define each one of your products in a unique way.” By describing your products using these attributes, users will be able to search and find your products easily.
One of the most important decisions is choosing in what format you will create the data feed. Google supports data feeds in two general formats, text (.txt) and XML (.xml).
The screenshot below shows the spreadsheet version of a product feed. Attribute names need to be included in the headers in the first row.
Automatic vs. Manual Upload
Now before getting into details about the data feed, you have two options to upload your data feed. This is either automatic or manual upload.
Automatic is the easiest way to do it, but not the most reliable because you do it with an FTP access from your Shopping Cart. You connect your shopping cart to uploads.google.com and you add the FTP username and password like this:
 In this case, my Shopping Cart Volution has the option to link the FTP to the Merchant Center. Keep in mind that not all Shopping Carts have that same option! Shopping Carts like Shopify, Magento and Xcart are stress-free to work with.
Remember, you need to keep the same file name on both sites. Once it’s linked, you just upload it through your shopping cart and this will be automatically uploaded to the Merchant Center.
Now, there are two manual options. The first one is creating your data feed from scratch like the screenshot below.

The other option is downloading it from the one that was created by the API, fix the errors (because you might have many), and manually upload the data feed.
Product Feed Specification
Google gives you a list of attributes that contain the most basic information about your items. Some attributes are required while others are recommended. Here are the following:
- ID:
This is the identifier for each item. It has to be unique within your account and cannot be reused between feeds.
- Title:
This is the name of your item, which is required.
- Description:
Describes the most relevant attributes about your product such as size, material, and other special features.
- Google Product Category
This Google Product Category attribute indicates the category of the product being submitted.
- Product Type
This field filters the category of the product submitted.
- Link
This is the landing page or just the exact URL where the user is sent to when your item is clicked on.
- Image Link
This attribute will display an image of your item. The accepted formats are the GIF, JPG, PNG, BMP and TIF.
- Condition
The condition attribute lets the buyer know if your item is ‘new’, ‘refurbished’ or ‘used’.
- Availability:
This attribute declares whether your item is ‘in stock’, ‘available for order’, ‘out of stock’ or ‘preorder’.
Price
The price attribute needs to contain the most prominent price on the landing page.
You can check the rest of the attributes right here: https://support.google.com/merchants/answer/188494?hl=en-GB
You can easily find these attributes in your shopping cart. This way you can easily export your feed from your inventory and save yourself a lot of time.
Depending on your industry, you will need certain attributes. For example, if you are in the clothing industry, you will need color, size and gender attributes.
1. Upload Your Data Feed
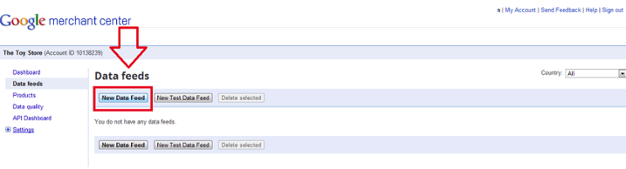
- Go to Data Feeds > New Data Feed
- As a next step, choose the country in which you want your products to display (if you want to target different countries, you have to submit a feed for each individual country, because some countries have different attribute requirements).
- You have two options: choosing the template spreadsheet or the existing spreadsheet that you created.
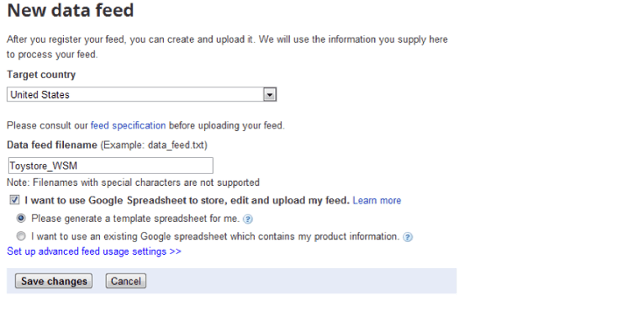
2. Save Changes
If you have more than 1,000 products, that’s when some Excel Advanced classes come in handy!
3. Upload Your Data Feed
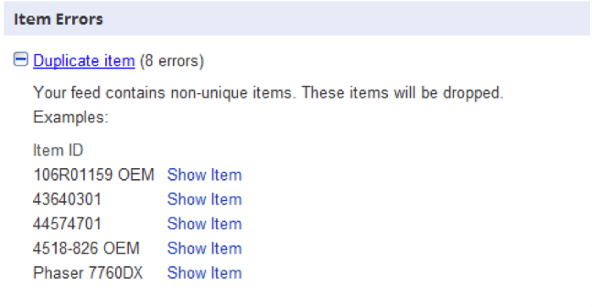
4. Data Feed Errors
 Click on view errors and a full list of item errors will show up. Like the screenshot below:
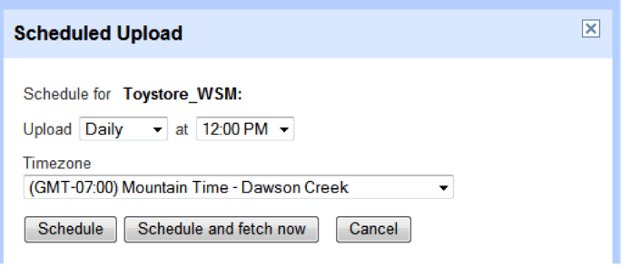
5. Feed Expires in 30 Days
You can schedule it yourself as well. Fill out the desired time and location of your feed:
That’s it! In my experience, getting the products and setting up the campaign is the easiest. What takes time and patience is setting up the data feed. Especially, if you have 100+ products, it tends to be very tedious.
Increase Your Sales with PLA Data Feed
Creating a PLA has several benefits, your customers being able to look at the details of your products, such as price, description and availability without clicking, is the most important one. You might have the lowest prices, but potential customers won’t know unless you are out there next to your competition. Another plus is that you can create auto targets for different ad groups. This way you can manage bids individually and launch promotions and discounts for your best selling products.
Once you start collecting data, you can optimize your data feed just like you would optimize your ads. You can focus on different attributes such as price, image, link, tittle, description, category, availability and ID. Additionally, you can run some data feed tests by using a different image, description, or another attribute. But keep in mind you can only run one test at time to find out which test benefited the most your sales performance.
The best practice is to run your Search and PLA campaigns together. This way, if you have conversion tracking installed, you can discover which keywords triggered the search for your PLA ads, and use those keywords to complement your search campaign.
If you are not using this great opportunity of having your products displayed, it’s time to start. You can immensely leverage PLAs data feed by increasing the exposure and sales for your business.
Share with us your experience with manually creating PLA feed and in what ways your business has benefited from using it.


